Introduction to Kivy, a multi-platform GUI library for computers (Windows, Linux, Mac) and Mobile (iOS, Android) - Kivy with Python Tutorials
Welcome everyone to an updated Kivy tutorial series. It's been quite a few years since I last poked my head into Kivy, and it's time to revisit it!
Kivy is a multi-platform GUI development library for Python, running on Windows, Mac, Linux, Android and iOS. The idea is, you can build an app in one locaiton, and use it across basically all devices. It's a super cool idea, but...only if it works. The last time I tried Kivy, I had a hard time getting it to run on Android, which shouldn't be too hard. We'll see how it goes this time!
To get Kivy, it really depends on your operating system. Head to Kivy.org, then go to download, then follow the instructions for what you'll be using. It's just a series of commands you need to run, so pause the video and get that done.
Next, like many things, I think it's best we just jump in without any further explanation. You know what Kivy is and why it could be awesome, now let's see what we can find.
To begin, let's make a basic app that will just display some text for us. I'll make a new file called epic.py, careful not to call your file kivy.py!
import kivy  # importing main package
from kivy.app import App  # required base class for your app.
from kivy.uix.label import Label  # uix element that will hold text
kivy.require("1.10.1")  # make sure people running py file have right version

# Our simple app. NameApp  convention matters here. Kivy
# uses some magic here, so make sure you leave the App bit in there!
class EpicApp(App):
    # This is your "initialize" for the root wiget
    def build(self):
        # Creates that label which will just hold text.
        return Label(text="Hey there!")


# Run the app.
if __name__ == "__main__":
    EpicApp().run()
On Windows or Linux, you run this like a typical Python file. On OS X, you will instead run with something like $ kivy epic.py.
You should see something like:
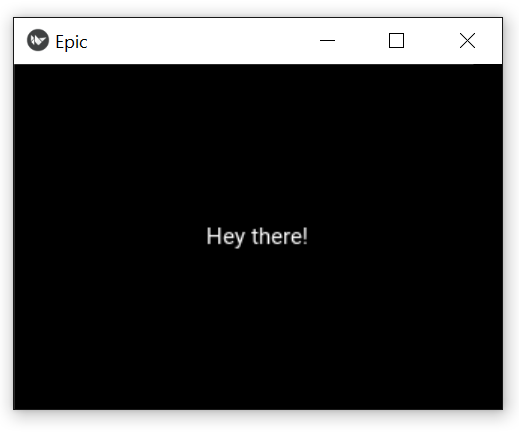
Notice too, you can resize this window and the text just automatically adjusts and is responsive to whatever sizes you throw at it. Kivy just does this out of the box, with many different layout options to choose from.
So the idea is to have a chat application, so let's continue. From our sockets chat app, we know we need a few things. Let's add in username, IP, and port field to the main screen, rather than just some text.
import kivy
from kivy.app import App
from kivy.uix.label import Label
from kivy.uix.gridlayout import GridLayout  # one of many layout structures
from kivy.uix.textinput import TextInput  # allow for ...text input.

kivy.require("1.10.1")

# An actual app is likely to consist of many different
# "pages" or "screens." Inherit from GridLayout
class ConnectPage(GridLayout):
    # runs on initialization
    def __init__(self, **kwargs):
        # we want to run __init__ of both ConnectPage AAAAND GridLayout
        super().__init__(**kwargs)

        self.cols = 2  # used for our grid

        # widgets added in order, so mind the order.
        self.add_widget(Label(text='IP:'))  # widget #1, top left
        self.ip = TextInput(multiline=False)  # defining self.ip...
        self.add_widget(self.ip) # widget #2, top right

        self.add_widget(Label(text='Port:'))
        self.port = TextInput(multiline=False)
        self.add_widget(self.port)

        self.add_widget(Label(text='Username:'))
        self.username = TextInput(multiline=False)
        self.add_widget(self.username)


class EpicApp(App):
    def build(self):
        return ConnectPage()


if __name__ == "__main__":
    EpicApp().run()
The comments should suffice here. If you don't understand super(), here's a quick, basic, example:
class One:
    def __init__(self):
        print("One!!!!")


class Two(One):
    def __init__(self):
        print("Two!!!!")
In this case, the __init__ of Two runs, but not of One. To get One to run, you can use super like:
class Two(One):
    def __init__(self):
        super().__init__()
        print("Two!!!!")
Now, they both run! Cool!
Anyawy, the result is:
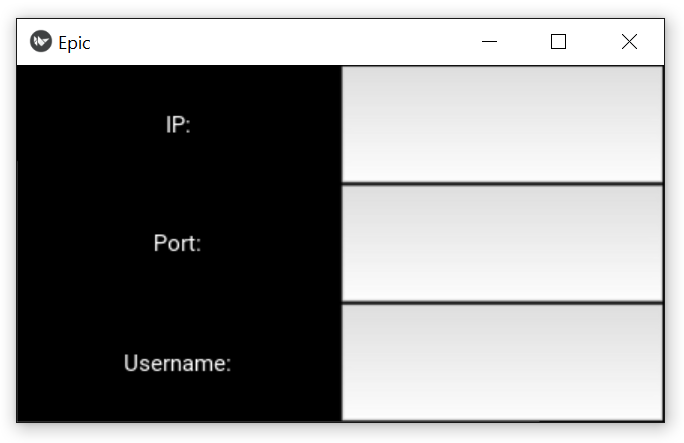
Okay great, so you've seen the basics of Kivy and just how quickly we can get up and running. We don't have anything too beautiful yet, but interesting nonetheless. In the next tutorial, let's cover how we can access the content a user types in. We expect the user to type in some info and maybe hit a connect button. From here, we want to access what they typed, and attempt to connect them to the chat room!
In the next tutorial, we'll add buttons and begin to add the event to handle for the data that is input into these fields.
-
Introduction to Kivy, a multi-platform GUI library for computers (Windows, Linux, Mac) and Mobile (iOS, Android) - Kivy with Python Tutorials
-
Buttons and Events - Kivy with Python Tutorials
-
Changing screens/views/pages with ScreenManager - Kivy with Python Tutorials
-
Scheduling tasks/functions/methods- Kivy with Python Tutorials
-
Chat Application Page - Kivy with Python Tutorials
-
Finishing Chat Application - Kivy with Python Tutorials
-
Packaging and Deployment (PyInstaller, Buildozer) - Kivy with Python Tutorials