Kivy with Python tutorial for Mobile Application Development Part 1
Welcome to the introduction to Kivy tutorial. First off, what is Kivy? Kivy is a multi-platform application development kit, using Python.
This means Kivy runs on iOS, Android, MacOS, Windows, and Linux! That's quite a bit! What's more is, not only does it run across the board like this, but you can also take advantage of multi-touch, which is common on mobile devices.
With Kivy, you can also access mobile APIs, like the Android API to manipulate things like the camera on a phone, the gyro sensor, GPS, vibrator, and so on.
I assume you already have Python. If you're new to Python, you should probably learn the basics of Python first.
Convinced? Great, let's get Kivy!
In order to use Kivy, you're going to also need PyGame, and likely Cython down the road, though we'll leave that out for now.
Since PyGame is a dependency of Kivy, we'll grab that first. PyGame is one of the original packages for creating games in Python. There is a PyGame tutorial seriers here on this website as well, if you are particularly interested in Game development.
In order to get PyGame, and then Kivy, we're going to use pip. So long as you have a recent version of either Python 2 or Python 3, you already have pip on your system. This tutorial is done with Python 3, though you should be able to follow along with Python 2.
Open bash or cmd.exe, and do:
pip install pygamepip install kivy
That should be it. Are you having trouble with pip? I have a more in-depth tutorial on how to use pip and how to handle various things like 64 bit requirements and if pip is not in your path:
If you need help with pip, check out the pip tutorial.
Once you have Kivy installed successfully, you're ready to begin your first basic program!
Kivy handles a lot of the back-end requirements for you. For things like where the mouse is, how a button should react when clicked, or, even how to manage multiple screens, Kivy has your back!
from kivy.app import App
kivy.require("1.8.0")

from kivy.uix.label import Label
Kivy App import, followed by a requirement for a Kivy version. This isn't required, but necessary if you're using new features of Kivy. Finally, we pull Label from Kivy's UIX packages.
class SimpleKivy(App):
    def build(self):
        return Label(text="Hello World!")
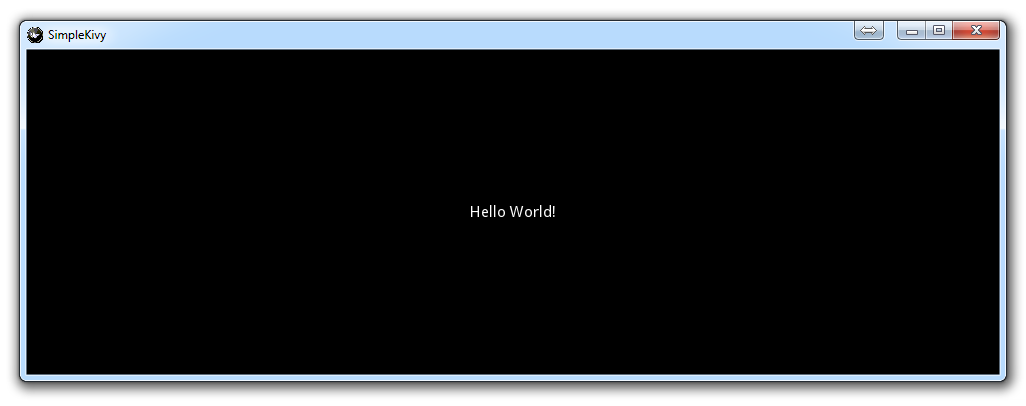
Now we create our main application, called SimpleKivy. We're inheriting from Kivy's App class. Our build method is an expected method for Kivy. Within our build, we're just returning a simple Label, which is just displaying "Hello World."
Confused by "class" or Object Oriented Programming? OOP makes the most sense in most cases when creating things like interactive GUIs (graphical user interfaces) or Games. OOP can be a bit confusing, though it doesn't have to be! If you're confused about OOP, check out the Object Oriented Programming Crash Course.
if __name__ == "__main__":
    SimpleKivy().run()
Now we run the code. What does this if __name__ == "__main__" mean?
That's all there is to it. You should get the following when you run the application:

One of the things that makes Kivy a superb module is the documentation. Kivy offers documentation on their website which is very well done, but Kivy also has extensive commenting within the actual Python module itself. It might be the most documentation that I've ever seen. If you want to know, for example, what you can do with this "Label," why not check it out in the module? To do this, do you know where to look?
Third-party modules are *usually* stored in the /Lib/site-packages/ directory of your Python installation. If you're having trouble finding it, however, you can usually get by doing something like:
import kivy

print(kivy.__file__)
That will give you the location of a module, which, for me, is:
C:\Python34\lib\site-packages\kivy\__init__.py
That's at least where the __init__.py is, but we're mostly interested in looking in the Kivy directory. Let's head there!
We see that we imported the "Label" from kivy.uix.label, so we can assume we'll find Label within kivy/uix/label.py.
Sure enough, there it is. Open it up to edit it, and just look at all those options...and all that commenting! Far more commenting than code. So, if you're interested in learning more about Kivy and the aspects of it, just browse your installation, or poke about their documentation!
For us, we're now ready to move on!
There exists 1 quiz/question(s) for this tutorial. for access to these, video downloads, and no ads.
-
Kivy with Python tutorial for Mobile Application Development Part 1
-
Kivy Widgets and Labels
-
The Kivy .kv Language
-
Kivy .kv Language cont'd
-
Dynamic Resizable Placement
-
Layouts: Float Layout
-
Getting Mouse / Press / Touch Input
-
Simple Drawing Application
-
Builder for loading .kv Files
-
Screen Manager for Multiple Screens
-
Drawing Application with Screen Manager
-
Adding better Navigation
