Publishing Django Project to a web server tutorial
Welcome to another Django Python web development tutorial, in this tutorial we're going to be discussing how we can deploy our website to a web server so other people can access it via the internet.
There are many options that you can choose from when deploying, but we're going to be using Digital Ocean. I have chosen for us to use Digital Ocean because it is a fully-featured virtual private server, which gives you full access to anything you might want, has plans that are as low as $5/month, and also comes with a "one-click-application" server that has a lot of the tools we need pre-installed. Despite being $5/month, you can be billed hourly, so even if you just wanted to follow along and then cancel, you could do that and pay a few pennies.
If you wind up going with Digital Ocean, you can support me and the tutorials, as well as get $10 free to start by using my referral link. This will give you 2 months of free hosting for your application at $5/month, and certainly allow you to get through the tutorial for free.
Once logged into Digital Ocean, click the big green "create droplet" button, and you should find yourself on a screen like:
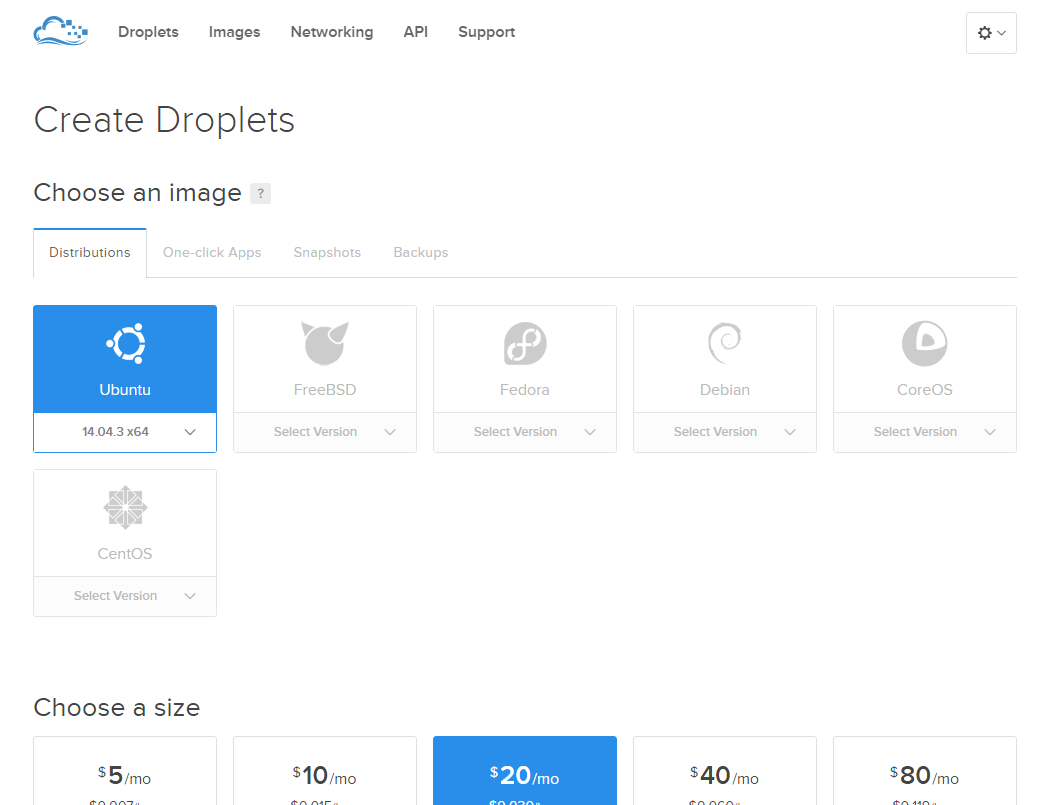
Next, choose the "One-click Apps" tab, and then choose Django on 14.04 (or later version if they eventually update this)
After that, choose size, and region. $5/month is more than enough for you starting out, and then you choose a region. You may want to consider your physical location, as well as who else might be using your website, and try to strategically place the server at a close distance geographically. Next, choose additional options. If you plan to continue using the server, you should consider automated backups, but you can enable this later if you change your mind. From here, hit create, and the server should spin up within about 60 seconds.
Once you have a server, you need some way to connect to it. On Mac or Linux, you should be able to open your terminal, and do something like ssh username@serverip. SSH stands for secure shell, and this gives you access to the server's terminal. On Windows, it's not so simple, but almost. For Windows users, I recommend PuTTY, which you can use to SSH. Beyond SSH, you may also want some sort of file copy and paste UI. Like SSH, you can do SCP very simply on Mac and Linux (not on Windows), but I tend to prefer to GUI for this anyway. There are many options here. On Windows, I like WinSCP, and for Mac/Linux/Windows you can also use FileZilla.
Get some way to SSH, and some way to SCP, and then go ahead and attempt to connect via SSH. Digital Ocean will send you the initial root user password to your Digital Ocean email, so you will want to check that. When there, copy your server's IP address, and then open SSH and connect with the username of root and the password as the one that Digital Ocean emailed you. Upon your first conneciton, you will be forced to change the password. You will also likely get a warning like:
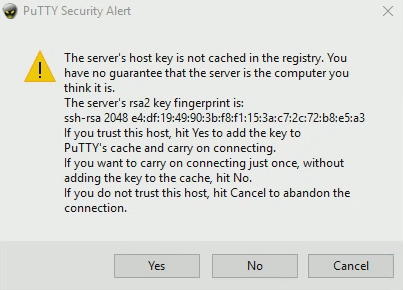
This is simply notifying you that this is a "new" connection that you've never made before. If you see this and you haven't changed servers, something has likely gone awry. If you see this on a brand new server, then it is totally normal.
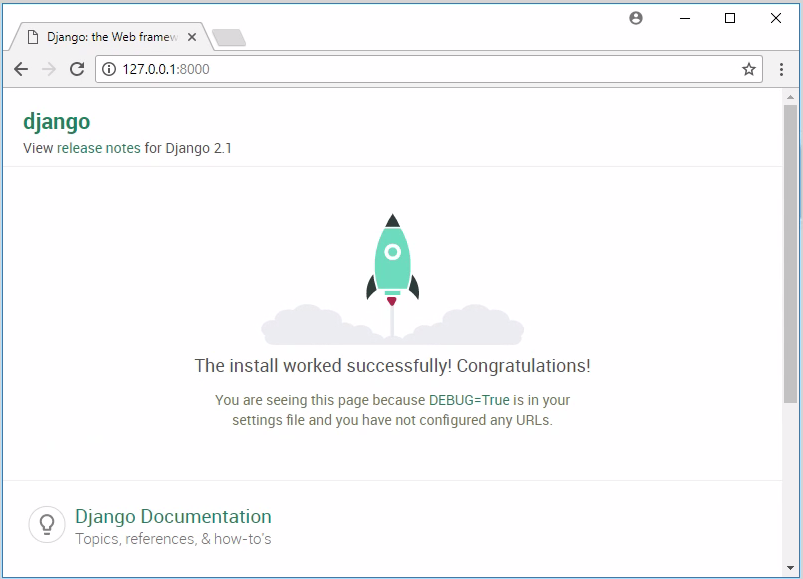
Once you have logged in, and set your new password, you're all set for now. If you go to your web browser, and enter your server's IP address, you should get the initial "it worked" Django landing page, like:
Great, so what we have so far is basically what occurs after you completed the first Django tutorial, after running the startproject command. That said, we've already got quite a bit of code that we've already written. If you are just now tuning in, you can either take the code you have personally written on your own and follow along, or you can grab our code up to this point: Part 10 sample code.
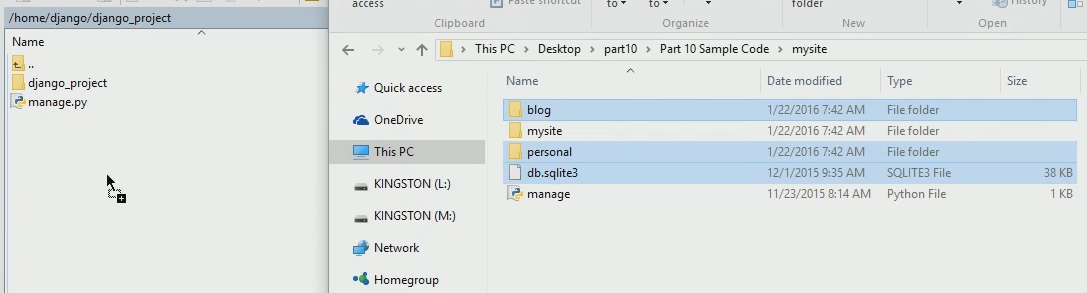
Once you know what files you're wanting to upload to the server, grab whatever SCP client/method you chose, and connect to your server (note: if you use FileZilla, you may need to specify that you're using port 22, which is a secured port). Connect to the server. If you're using a new client, this would be the first time you're connecting, so you may get another finger print warning. Once connected, you will likely wind up in the user directory that you're logged in as. In our case, that is /root/. The one click install for Django with Digital Ocean places our Django project at: /home/django/django_project/. You should notice how within django_project, there is another django_project directory. This is the same as our mysite/mysite. Opening our local files, head to mysite/ and grab the blog, personal, and db.sqlite3 files/directories. Take those and drag them to your SCP client, putting those into the /home/django/django_project/ directory.
At this point, we need to either change all django_project paths to mysite or visa versa. I am going to elect to changing mysite, as this is more likely to be the operation you perform in the future. Soon, you may decide to incorporate someone else's application into your own, and this may be required of you to make that work.
Basically, we've added new apps here, so, as usual, what must we do? We need to install the apps! Heading to /home/django/django_project/django_project/settings.py, we want to install the new apps. We have two apps, blog and personal.
INSTALLED_APPS = (
    'django.contrib.admin',
    'django.contrib.auth',
    'django.contrib.contenttypes',
    'django.contrib.sessions',
    'django.contrib.messages',
    'django.contrib.staticfiles',
    'blog',
    'personal',

)
Next, we need to set the django_project database to use SQLite (still editing the settings.py file)
DATABASES = {
    'default': {
        'ENGINE': 'django.db.backends.sqlite3',
        'NAME': os.path.join(BASE_DIR, 'db.sqlite3'),
    }
}
Next, we want to visit our mysite/mysite/urls.py and grab the urls that point to personal and blog, adding these to django_project/django_project/urls.py
url(r'^', include('personal.urls')),
url(r'^blog/', include('blog.urls')),
Next, we may want to go ahead and update Django on the webserver. Heading to SSH, assuming you are already connected, you may want to do the following:
apt-get update
apt-get upgrade
pip install --upgrade django
service gunicorn restart
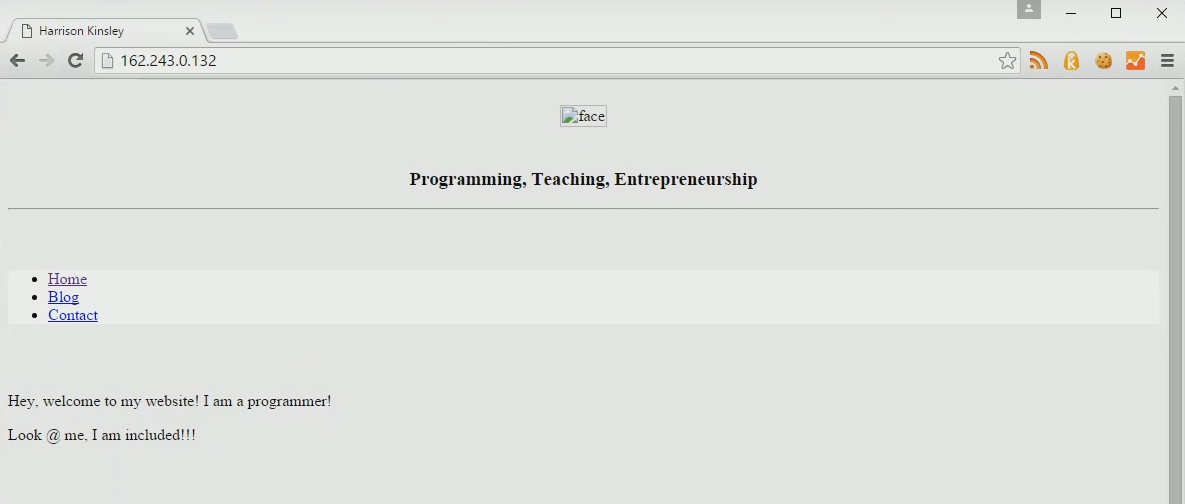
Now head back to your browser, with your server IP in the address bar, and then refresh. At this point, you should get your blog, except you're likely missing things like images and CSS. Something like this may be happening to you:
It is possible that this is not a problem for you in the future, but, for now, the one click app is not easily linking static files, and we'll need to handle for it.
What is happening at the moment is the Digital Ocean Django on 14.04 application is simply not finding the static files, mainly because it does not know where to look. No problem, we can fix that. First, we want to do:
nano /etc/nginx/sites-available/django
This will open the configuration for Django, and then you're going to want to use your arrow keys to scroll down, looking for the Django project's static file directory. Find the following:

For me, the path is /home/django/django_project/django_project/static. Copy this, and head over to your SCP client, heading to /home/django/django_project/django_project/settings.py, edit the file, go down to the bottom, and you will be adding a new variable, STATIC_ROOT above STATIC_URL like so:
STATIC_ROOT = '/home/django/django_project/django_project/static'
STATIC_URL = '/static/'
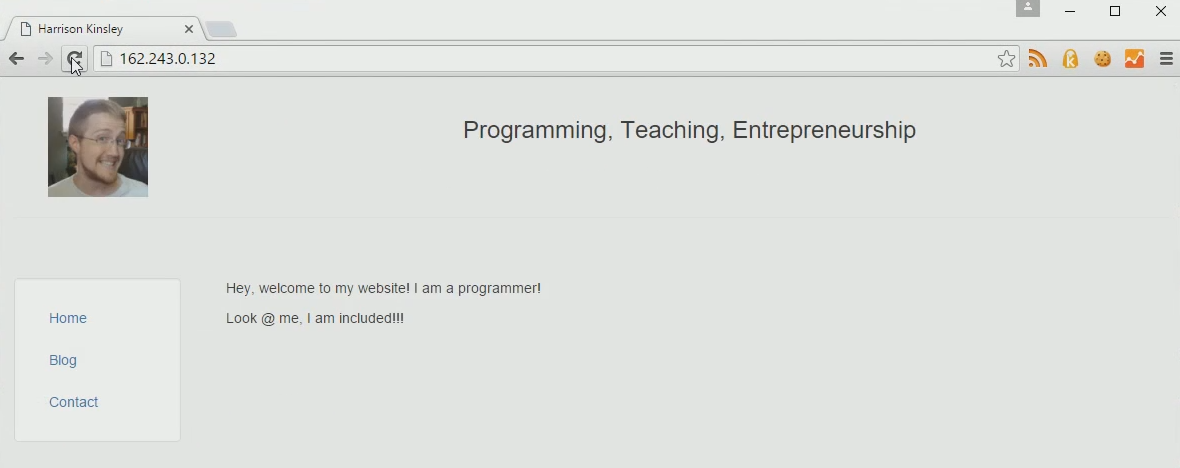
Note that your static path may be different, but is likely the same as mine. Save, exit. Heading back over to SSH, exit the configuration file if you are still in it (control+x), do not save if it asks you to save. Next, do: cd /home/django_project/, which will change directories in the terminal to that location. You should be in the directory now that contains the manage.py file. What you want to do next is run the following via SSH: python manage.py collectstatic. Hit enter, type yes, and you should see a message about your static files having been copied to the static location. Great, now head back to your browser with the server's IP address, hit refresh, and you should now have your static files working:
At this point, we're basically done. That said, if we want to share our website at the moment, that means we're needing to share the IP address, which is pretty hard to remember. What we're going to show next is how to attach a domain name to a web server. In order to do this, there are two major steps, assuming you already have a domain name. If you do not have a domain name already, you will need to get a domain name from a domain registrar. Something like domains.google.com or GoDaddy will suffice. Once you have a domain name with a domain registrar, you want to set the nameservers for that domain name.
On Google domains, it's a button:
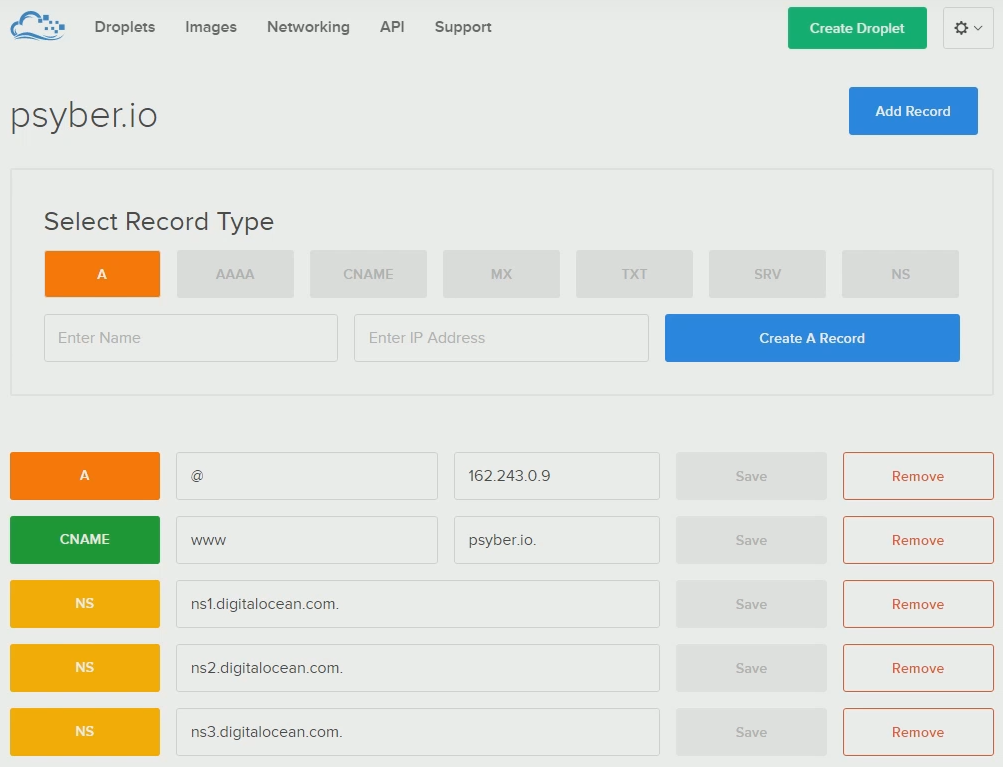
Click that, and, depending on the registrar, the screen may look different, but you are basically looking to set custom name servers. Generally you will set something like 2-4 nameservers. For Digital Ocean, you want to add:
ns1.digitalocean.com
ns2.digitalocean.com
ns3.digitalocean.com
Add those, and save it. Setting/changing name servers can take anything from being instant to 48 hours. Generally, most registrars will update nameservers within 15 minutes, but, if you are changing name servers, it can take up to 48 hours to fully happen.
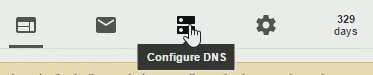
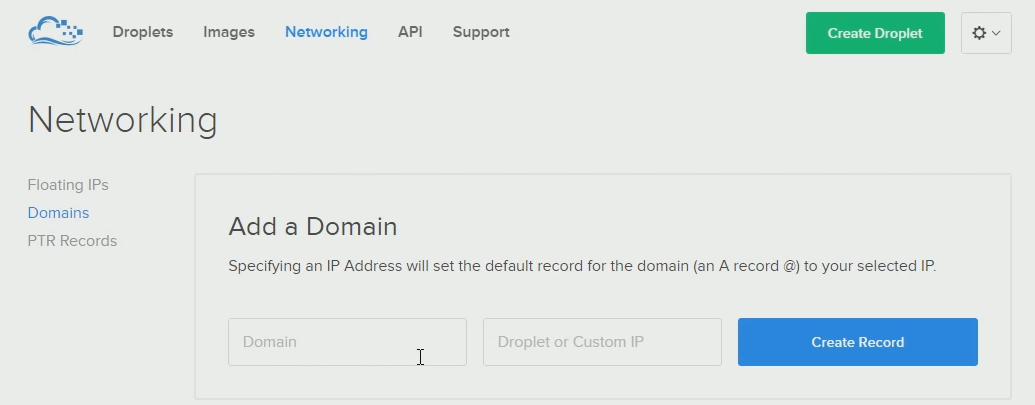
At this point, you are telling the world that your domain points to the nameservers that you chose. All that is happening at this point, however, is that Digital Ocean now has the responsibility to route traffic, but Digital Ocean, at the moment, has no idea what you want them to do with your domain. Thus, next, we need to head to Digital Ocean (or whatever host you are using), and you will want to head to the networking / DNS area for your host. Just like the nameservers on the domain registrar, things may be slightly different depending on your host, but usually things are pretty similar. On Digital Ocean, you go to Networking at the top, choose Domains, then "add a domain." There, you fill in the domain name that you wish to handle for, and then you specify the server that you want to handle the domain.
Once that's done, the records for your domain should look something like:
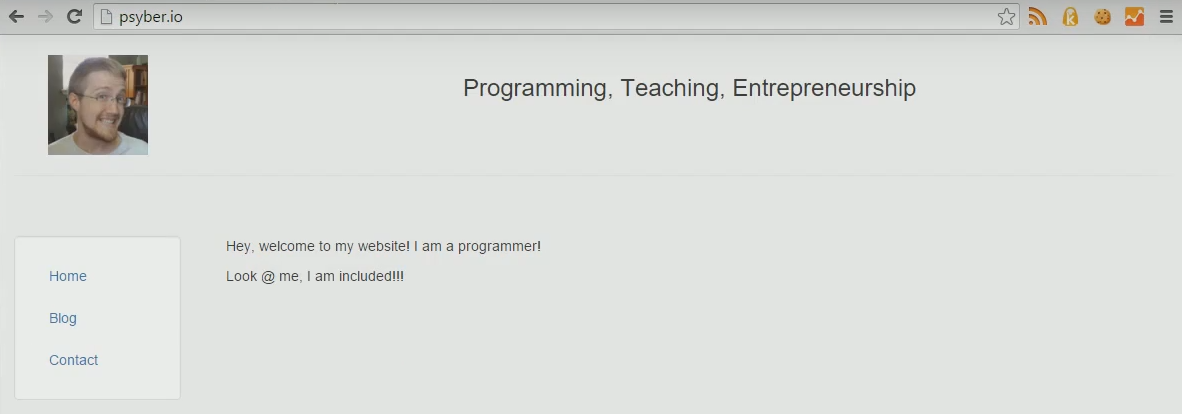
Finally, once everything is saved, you should be able to go to your domain, and your website should load.
Now that you've moved servers, you will need to recreate the admin user:
python manage.py createsuperuser
You may also need to give the django user (on your server) permissions to write to the database file. If you clicked and dragged the sqlite database, this means it was created likely by the root user, so you will need to give read/write access to the sqlite file. Something like chown django:django db.sqlite3 should do the trick. Thanks to user FrOyxx for bringing up these missing pieces!
At this point, you should have your Django project in the cloud, assigned to whatever domain name you want. In the next tutorial, we're going to add a cherry on top by implementing free SSL so our traffic can be HTTPS traffic.
-
Django Web Development with Python Introduction
-
First Website - Django Web Development Tutorial
-
Jinja Templates - Django Web Development Tutorial
-
Design with HTML/CSS - Django Web Development Tutorial
-
Jinja Variables - Django Web Development Tutorial
-
Beginning a Blog - Django Web Development Tutorial
-
Views and Templates - Django Web Development Tutorial
-
Database migrations - Django Web Development Tutorial
-
Admin control panel - Django Web Development Tutorial
-
Finishing blog - Django Web Development Tutorial
-
Publishing Django Project to a web server tutorial
-
Securing Django web server with SSL - HTTPS and Lets Encrpyt